Pages

August 25, 2015

Homemade Grape Juice - No Sugar Added!


Wondering what to do with all of those beautiful, ripe grapes ready for the picking in your yard here in the Pacific Northwest?  A fabulous friend of mine from work had these beautiful grapes growing in her yard and she didn't have any real plans for them.  Lucky for me she brought them to work to share, and I was the lucky recipient!


  At first I really wasn't sure what I would do with them but how do you turn down such beautiful produce from someone's home garden?  I didn't want to make grape jelly, not really a family favorite around here.  And I heard of grape pie...but I wasn't that adventurous.  I do however like to give my family whole clean foods with as few additives as possible.  That's when I chose Grape Juice.

I honestly had never made it before so I did some researching on the internet.  I knew there wasn't quite enough grapes to really can any kind of significant amount so I wasn't concerned with the canning recipes.  I was really just looking for the 'how to' recipes for making the juice.  They were all pretty much the same and varied on the water or time cooked so I decided to wing it.


Here you can see I separated the majority of the stems and put the grapes into a large stock pot.  I added probably 2 cups of water and put my heat on medium low to start cooking down the grapes.  I ended up stirring them a bit to turn over the cooked grapes from the bottom.  Eventually they all turned a dark red purple and the skins starting cracking.  I mashed them up some with my potato masher and let them simmer another 15 minutes or so.


Next was the straining.  These grapes had seeds and we needed to strain off the seeds, skins and remaining stems.  I used a regular strainer with a cheese cloth for this.


And these beautiful grapes....


Magically turned into this beautiful, sweet Homemade Grape Juice!  


Ingredients:

Grapes
Water

That's it!  Feels so good to know where our food comes from and to try something new I can share with you too.  If you try out the recipe, be sure to tell me how yours turned out.  And I'd love to hear any ideas you have to harvest your grapes too.  Thank you for stopping by my blog, you are all truly appreciated!

August 17, 2015

Refinished Family Farm Style Dining Table


Welcome to my blog!  I'm glad you are back for a visit and welcome if you are visiting for the first time.  Today I'm sharing our refinished dining table that I did with a 'farm style' finish in mind.

I bought this table from a friend many years ago now and had been storing it with the intention of refinishing it.  We had not yet purchased our home yet and were not sure if the home we bought would have room for this style of table.  It's the large square table, but not the bistro height they make many of them like today.  It's the standard height dining table.

Here is the before of picture of what I was working with.


I knew I wanted the white legs and the stained dark top but...... I really hate to sand.  So, I started with these products knowing they would help eliminate SOME of the sanding!  Here are a few links for you to research the product a little further or even purchase the item and have it shipped directly to you from Amazon.  With three kids at home, I have fallen in love with Amazon Prime.  It ships in 2 days directly to my home with no shipping charges for many products!  That's a win win around here!

Dark Walnut Varathane

Polyurethane - Satin Finish 

Annie Sloan Chalk Paint - Pure White


But to get the stained top, I was going to have to sand it as much as I don't care for it.  It doesn't bother me as much when it's a flat top surface like on a table top.  And I recruited my amazing husband to assist with the sanding.


Once the top was sanded completely to the bare wood, we cleaned it with a moist paper towel and let it dry.  I stained the top with 2 coats of the Dark Walnut Stain and 2 coats of the Satin finish Polyurethane.  I then painted a few coats of the chalk paint on the lower half of the table using a clear furniture wax to seal it.

The chairs, were a different story.  I will be honest, because I didn't mind a shabby chic look to the chairs, I didn't sand OR use chalk paint.  I spray painted them all white and then sanded the edges that would wear anyway because I didn't sand them. But the white was a near match to the chalk paint so I don't know that anyone can tell the difference.


You will notice I also recovered the seats.  This was done with some leftover fabric my mom had and offered to share.  The fabric is thick enough to stand up to normal wear and tear but not so thick that it was hard to work with.   I removed the seat cushions by unscrewing them from the chair frame, cut fabric to fit and then used a staple gun on the underside to attached the fabric.  I recovered it right over the existing fabric since it was a similar texture and light color that would not show through. 

Here's how it turned out!  Some of the shots below show it with the leaf and without the leaf. 


I have some rattan chairs I have added as the head chairs to the table to give it some additional interest and texture. I really love the style of this table now that it's all done.   And there is plenty of room for our family of five, plus a couple extras if we add more chairs!

Let me know your thoughts too and please feel free to ask any questions!  DIY is always providing new products and ways of doing things so I love to hear all about what you have learned too!  Maybe I can try your techniques on my next project.


August 12, 2015

Craftsman Curb Appeal- BEFORE & AFTER!!!!


From the time we drove by this house the first time, my husband said we needed to change the paint colors.  We argued back and forth about what to change exactly.  He called it the 'Hansel and Gretel' house.  We both agreed that SOMETHING needed to change.

Here is what we started with, and what we ended up with.  My husband seriously hated this house on the outside when we first looked at it.  And every time thereafter, until we made some changes.


So initially, it was obvious to us we needed to make changes to make it look like the style that we are attracted to.  But, the plus factor was that it is a craftsman style home with my favorite finish of river rock.

We started by walking around the house and making a list of the changes we wanted to make.

1. Change out all gold hardware ( doorbell, front door hardware, house numbers)
2. Change all the lighting out for craftsman lighting
3. Change the paint somehow.  (We chose to change only the trim, upper peaks and add shutters)
4. Landscaping (change the orange type bark to a more contemporary dirt/bark)
5. Garage Door Hardware update?

So, that's where we started!

1.  Gold Hardware

BEFORE:


 And the after pictures:


2.  We then decided to move forward with changing out the lighting.  Here's the before and after.

Finally, we just had to paint.  And you will see in the before and after pictures that we had already started painting.

3.  We chose to paint out only the trim in a creamy white.  Then the upper peaks in a darker color to accent the house.  And finally we added shutters in black and painted the front door to match!

Here are several pictures to update!


Before Garage:
 After!

4. Landscaping!  Check out the before and after.  The only real change here is in the orange bark versus the black bark.


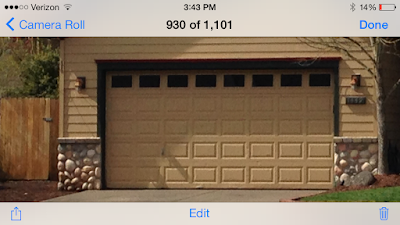
5. Our final touch, as you can see in the above picture is the carriage hardware on the garage.  We really love the detailed look that provided!

Here's the official AFTER!


Yes, my husband is in the after picture, I'm just noticing that.  But you can still see the BIG changes and curb appeal of the changes we made.  I love to drive up to my home.  All these little changes made such a HUGE difference!

We later added black shutters on all the windows up front that you can see in the very first photo of this post.  They match the door that was painted black.

Thank you for coming by my blog and let me know if you have any ideas, pointers or thoughts!  You are so appreciated!

August 10, 2015

DIY Industrial Wall Sconce Light


Good Morning!   It has actually been years now since I last posted on this blog.  I stopped posting when I went back to work full time after baby number three.  We have been through a few homes and many adventures since that time.  We now own our own home again and I have been blessed to be able to cut back my work hours to part time.  That got me thinking about my blog and sharing much of what I already do in our home again.  When I looked up this old thing I found at the bottom of the page that I have had almost 700,000 page views since I created it!!!!  And I haven't touched it in years!!!  So I thought I'd give it a shot again.  So here it goes and welcome to my blog.

We bought a house that was built in the late 90's.  Needless to say there are many finishes in the home that need updating.  I honestly prayed for a house like this one,.  If it was all finished and updated and perfect when we bought it, what in the world would I do?

This wall sconce is in the hallway leading up the stairs.  It wasn't bad, it just didn't fit into the style that I really love.  If I had to describe my style I'd say it's a cross between old farmhouse, industrial and shabby chic.  So I decided to try to update it somehow and see if I could do it without buying something new.

Here is the light before.

 I had seen a few things on a few different blogs and of course on Pinterest, but nothing I really loved.  Until ...I saw this lighting redo on one of the blogs I follow at Bless'er House.  This is where I got my inspiration although it's not exactly the same.

DIY Industrial Pendant Lighting

My light is not a pendant, but I really love the cage she used.  It looked like it could be super easy based on how my wall sconce shade fit similar to that of a pendant.  So I followed her link to the amazon product where she showed the cage that she purchased and bought it!  It came just like this.


You can buy one on Amazon with this link...

It even had screws attached to the top to tighten down and hold it into place in the same area the glass shade was currently sitting.

I turned off the electricity at the breaker and disconnected the wires.  Then I took apart the lamp removing the existing shade.  I attached the new metal lamp guard by tightening down the screws it came with and took it into the garage for a little paint job.

This is one of my favorite products and goes well in my home.  You can get it here with this link...


I gave it all a quick coat of paint and let it dry.  Then one more coat to ensure good coverage.

After that I just reconnected it to the electricity on the wall and turned the breaker back on so I could test and make sure the light worked.  I was so excited and pleased with how it turned out and I love the way the look goes with the rest of my house!  


Thanks for stopping by today!  I would love if you followed me on facebook and came back for a visit!  Better yet, follow my posts so you get an email each time I update with a new project!  Thank you all for your support!


Blog Archive