Family, Faith, Food, DIY, and our little Farm! Welcome to The French Family Farm! We want to share our FFF with you! We have dreamed of having our own little farm since back to the days that we were first dating and God has blessed our family with our very own little slice of heaven right here in East Texas! Y’all, we are learning and growing this farm so things won’t be perfect but we will share the mistakes we make too!
November 20, 2015
Rock Fireplace Surround
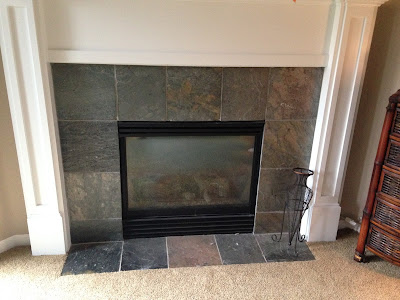
When we first made an offer on this house, the fireplace looked like this. It was the starting point and I ...had a vision!
I truly believe that paint is a miracle in a can. Look how much a little paint changed the whole look of this room!
But I had this vision of what I wanted in my head and somehow I wanted to add more charm and personality.
During the years before we bought this house, I would plan and decorate my 'forever home' in my head over and over. And occasionally, I would even buy a product and save it if I thought I couldn't live without it!
This was the case with this river rock tile. We bought 2 boxes of this stuff probably 6 years before we bought this home. And hauled it with us everywhere we moved! Yep, and each time I saw those boxes I would start dreaming up places I could use it in our 'forever home'.
I decided the fireplace was the perfect place to add this charm and personality. It was really so rewarding to be finally installing it in our forever home, after dreaming about it for so many years.
The back of the product is a mesh material. It's made this way so that you shouldn't have to install each rock individually.
We started by thoroughly cleaning the existing tile. Then we used a product called Mastic for ceramic tile installation. We used a product very similar to this one available on Amazon.
Custom Building Products - Mastic
We made sure to apply the Mastic in small areas we could work with quickly about 1/2 inch thick. But after installing the first 2 mesh tiles, we had a problem. They were to heavy and sliding down the fireplace! I would be lying if I told you I wasn't completely freaking out at this point!
We ended up having to pull every single rock off the mesh and manually place them around the fireplace individually. Yep, individually. It wasn't too bad working as a team. But all alone this would have been a chore.
We waited about a week for everything to dry really well before attempting the grout process. I chose a neutral beige unsanded grout, that would essentially disappear and let the rocks be the star of the show. It's like a peanut butter consistency once you mix it up. And you push it in between all the rocks making sure no spot is missed. Then you wipe the excess off the top to let the rocks show through.
I am so in love with how this turned out. One of those things that every time you walk by the room you catch yourself stopping to stare? Am I the only one who does that?
Thank you so much for reading about my project! I truly appreciate each and every one of my readers and would love to hear if you ever try the project on your own. And share your results with me, please!
Subscribe to:
Post Comments (Atom)


How awesome is this!!! Great job Heather, it looks so professional, I love it...:) :):)
ReplyDeleteHeather that is awesome and GORGEOUS! You keep inspiring me! Cezanne
ReplyDelete